Clean and Maintain a Samsung Air Purifier
 Please Note: The information on this page is for Australian products only. Models, sequences, error codes or settings will vary depending on location and/or where the product had been purchased. To be redirected to your local support page please click here.
The great thing about the Samsung Air Purifier is that you get to enjoy pure air in various ways to suit your needs. The Air Purifier uses a multi-layered purification system. Firstly, the pre-filter extracts larger dust particles. An Activated Carbon Deodorization Filter can also remove harmful gases*. Finally, the advanced HEPA Filtration with ultrafine dust filter captures up to 99.97% of 0.3㎛ sized dust**.
For the multi-layered purification system to do what it is designed for, the Air Purifier will need to be cleaned and maintained at certain periods. If the Air Purifier is used 24 hours a day, you will generally need to replace the 2-in-1 filter every 6-12 months and clean the pre-filter every 2 weeks.
A Filter Change Alarm will sound and the Filter Change icon will blink when the filter needs replacing. If you would like to purchase a replacement Air Purifier Filter please click here.
Below is a guide on how to access the filters.
* Tested on the AX80K7580WFD for toluene, xylene, benzene, ethylbenzene, styrene & formaldehyde gases in the National Test Institute of Korea.
** The filter media has over 99.97% dust collection efficiency, based on a particle size of 0.26㎛, as specified by 42 CFR part 84. Tested in the National Test Institute of Korea.
Note:
- If you are using the Air Purifier for the first time or have purchased a new 2-in-1 filter, please ensure to remove the 2-in-1 filter from the vinyl packaging before use.
Place the pre-filter in the shade until it is completely dry.
It is recommended to clean the pre-filter once every 2 weeks if the Air Purifier is in operation 24 hours a day.
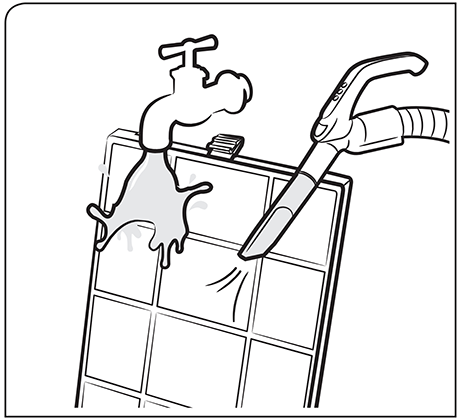
Caution: Do not use a brush or a similar tool to clean as this may damage the pre-filter.
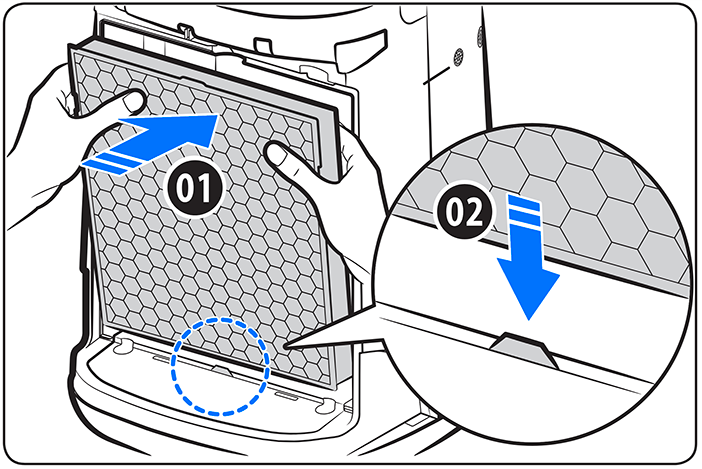
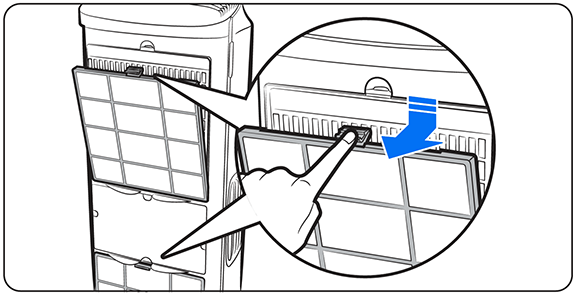
Place the 2-in-1 filter back into postition (01) and slide the filter down to fix it into place by using the grooves at the bottom (02).
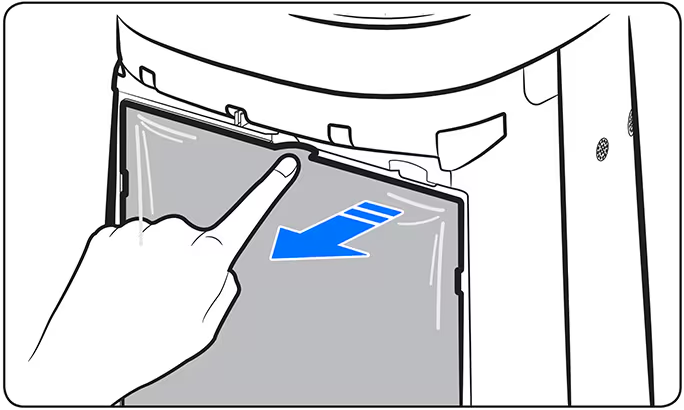
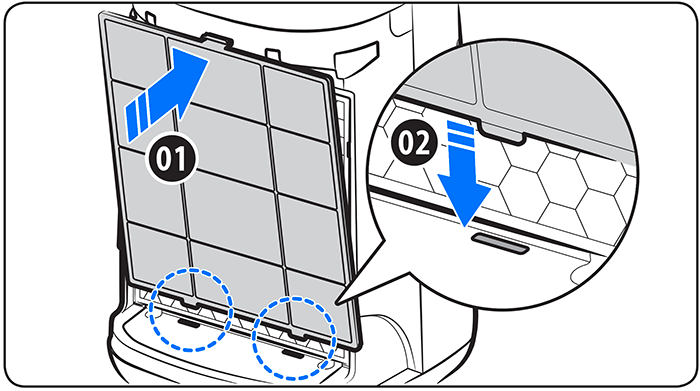
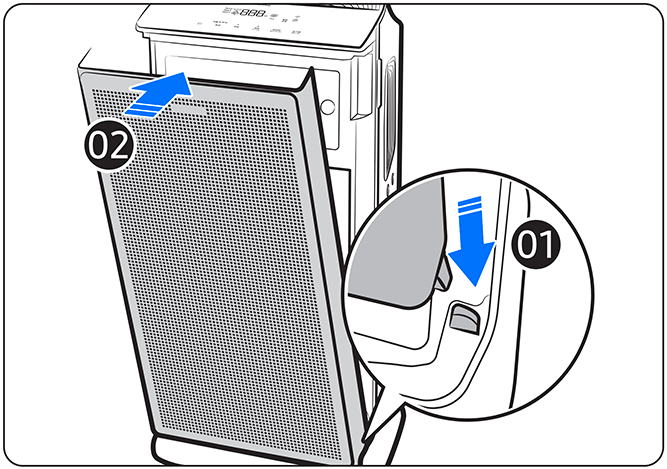
Place the bottom of the Pre-filter into the grooves at the bottom (01) and then gently push the Pre-filter into place (02).
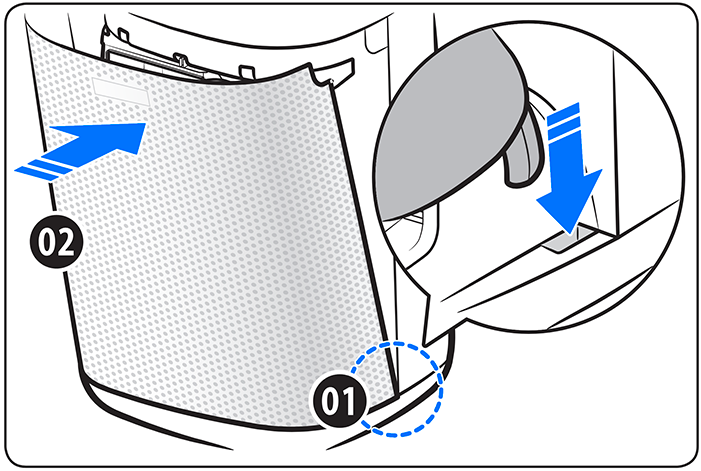
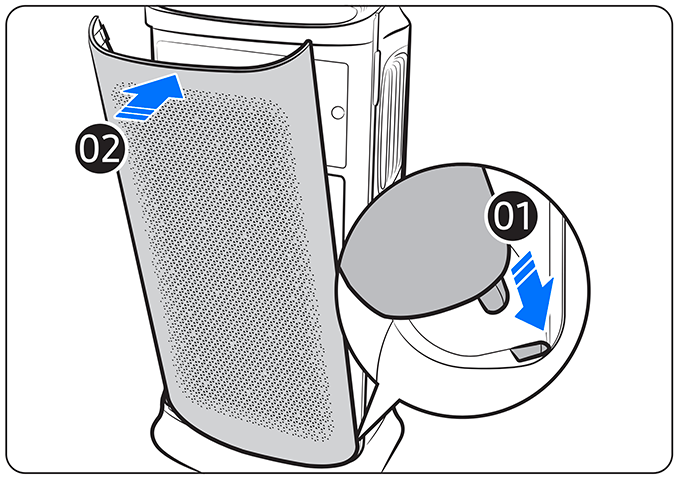
Place the hooks of the front panel into the grooves at the bottom of the Air Purifier (01) and push the panel into place (02).
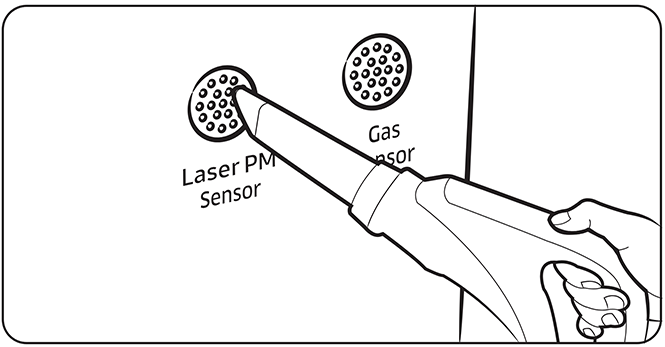
If there is dust or foreign substances on the sensor, use a vacuum to clean the sensor and its surrounding. If there are any foreign substances on the sensor, it may not perform properly.
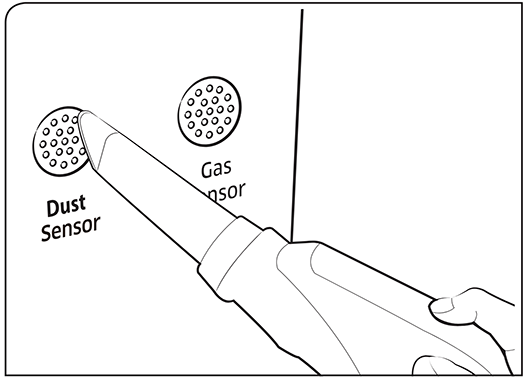
Disassembling and Re-assembling the Grille to Clean the Air Outlet
- If the air outlet is dirty, disassemble the grille and re-assemble once it has been cleaned.
Disassembling:
Step 1
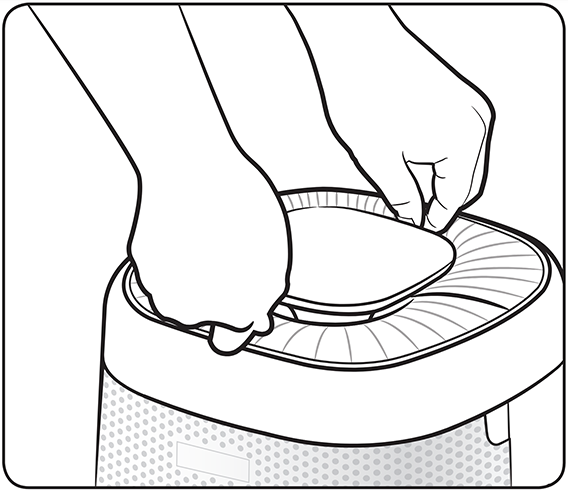
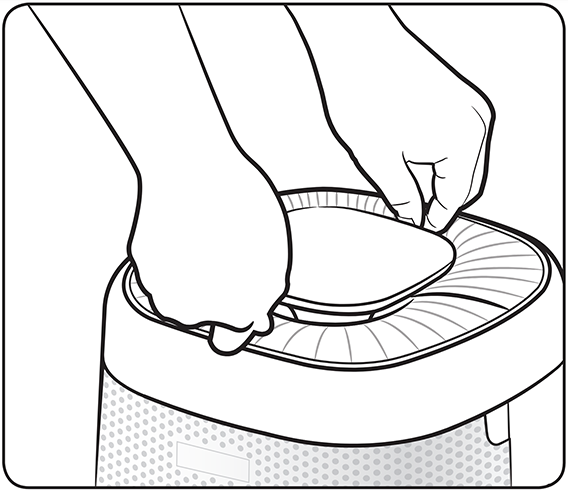
Grip the front and rear grille.
Step 2
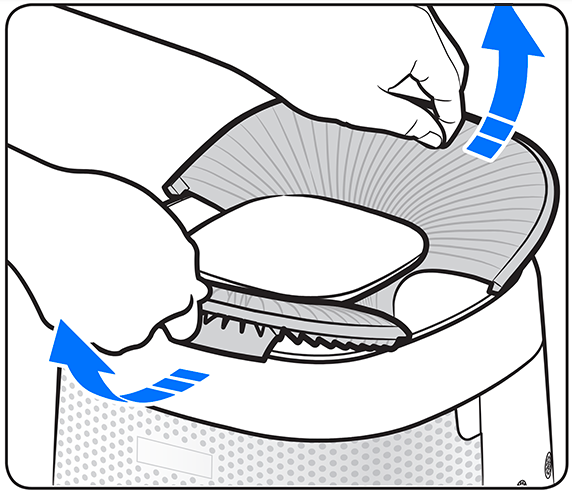
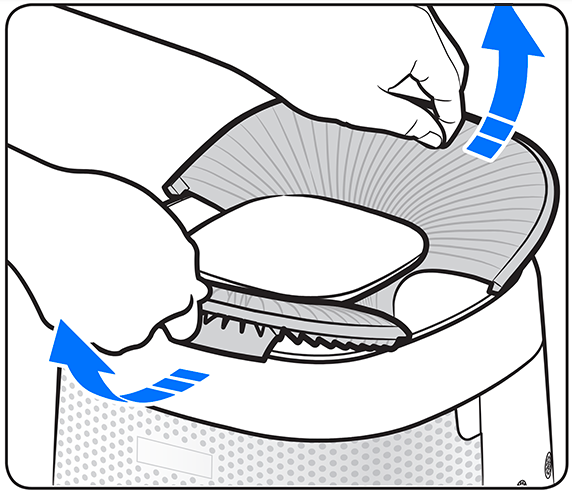
Take the grille out to form a V shape.
Step 3
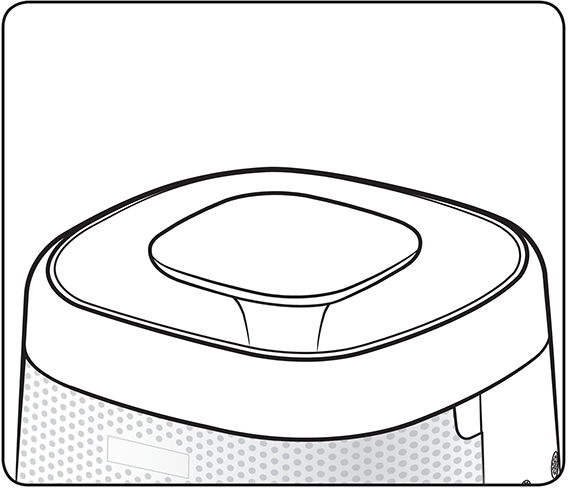
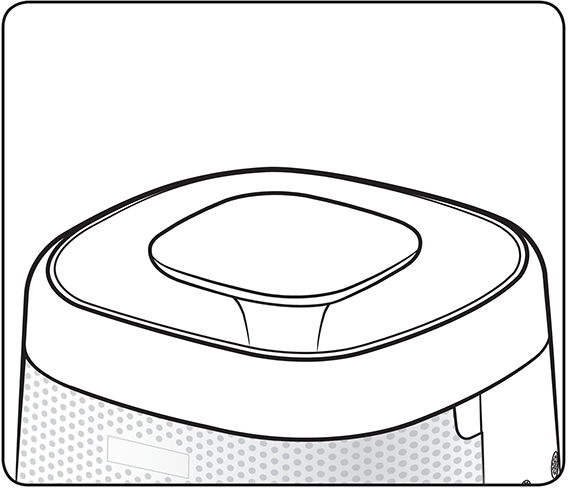
Remove the grille completely.
Re-assembling:
Step 1
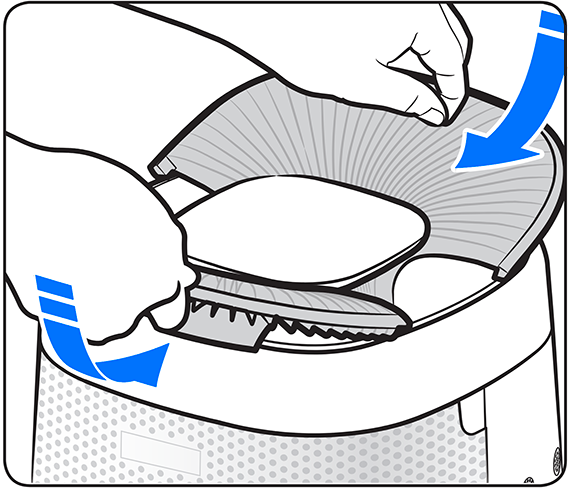
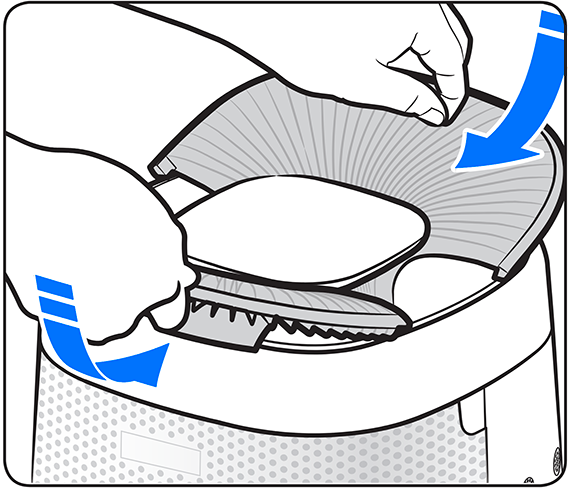
Insert the grille in the front and rear direction of the display.
Step 2
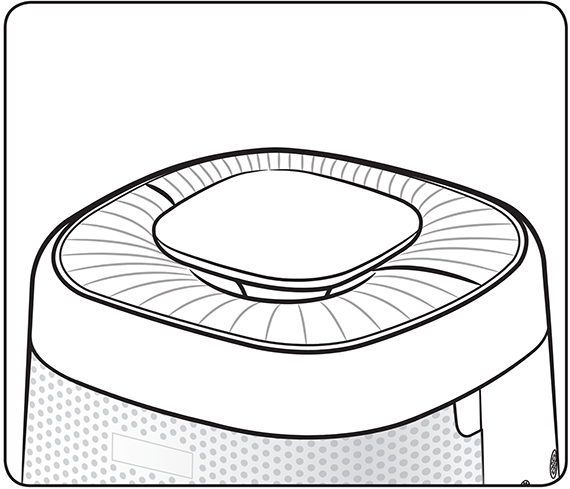
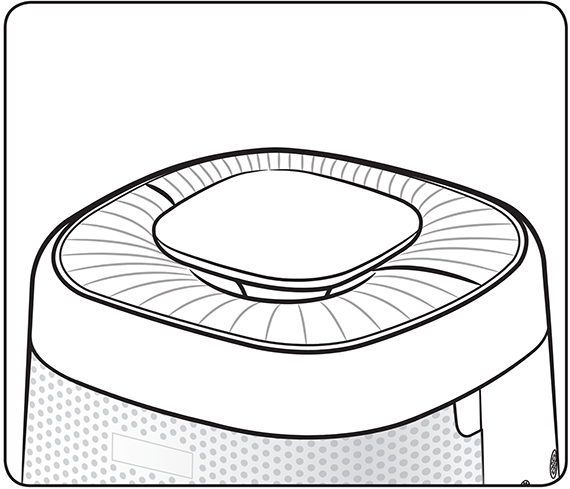
Flatten the inserted grille.
Note:
- Do not insert the grille in the left and right direction of the display.
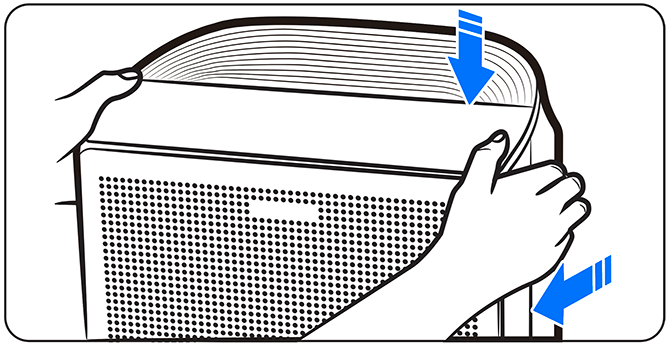
Clean any dirt or foreign substance on the front panel with water or a soft cloth.
After cleaning with water, thoroughly dry the front panel before reassembling it to the product.
If you see dust accumulated on the pre-filter, remove the large dust first with a vacuum, and then rinse the filter with lukewarm water.
Dry the filters in the shade away from direct sunlight until completely dry.
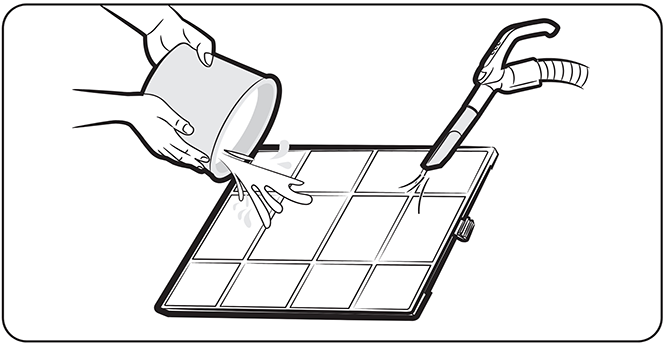
Note:
- Cleaning the pre-filter by rubbing with a brush or a similar tool may damage the superfine fibres.
First, insert the hook on the panel into the groove at the bottom of the product (01) and push the top of the panel until it clicks in (02).
If there is dust or foreign substance on a sensor, use a vacuum to clean the sensor and its surroundings.
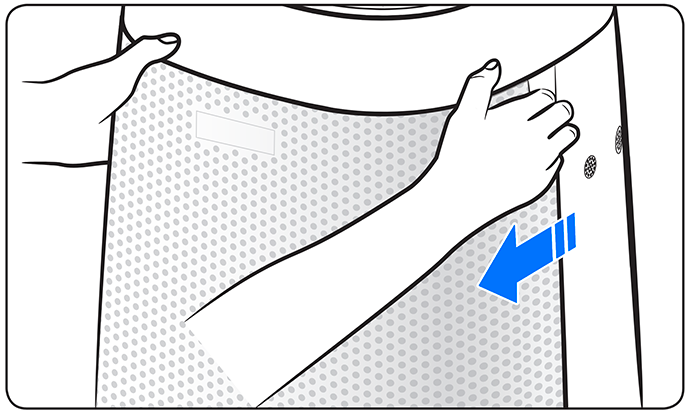
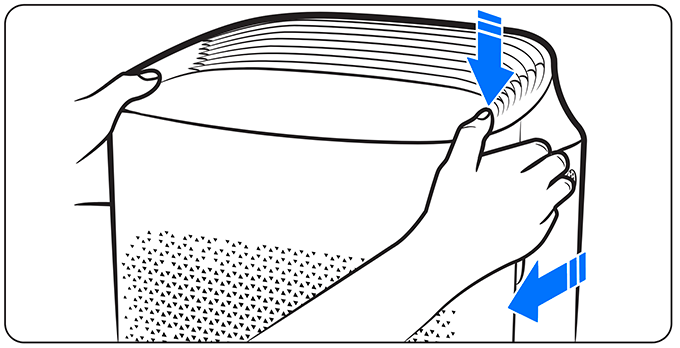
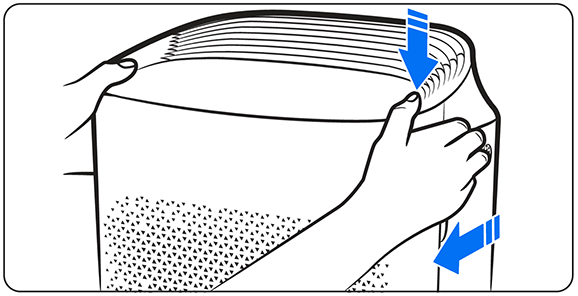
Use your thumbs to press on the top of the product and pull the front panel forward with your other fingers.
(*Cleaning interval: 2 weeks - when using the product 24 hours every day)
Depending on the dust accumulation, first remove dust with a vacuum and gently wash the filter with a pH-neutral detergent diluted in lukewarm water.
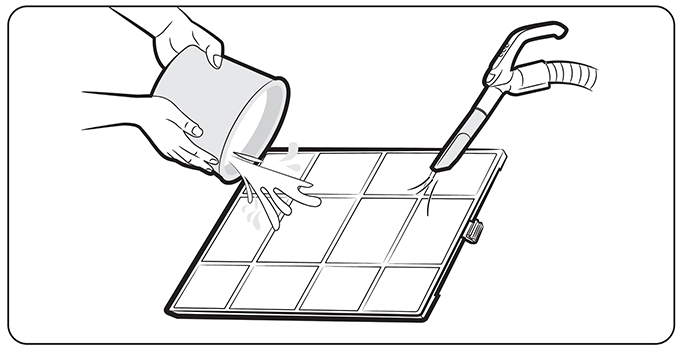
Note:
- Cleaning the pre-filter by rubbing with a brush or a similar tool may damage the superfine fibres.
If there is dust or foreign substance on a sensor, use a vacuum to clean the sensor and its surroundings.
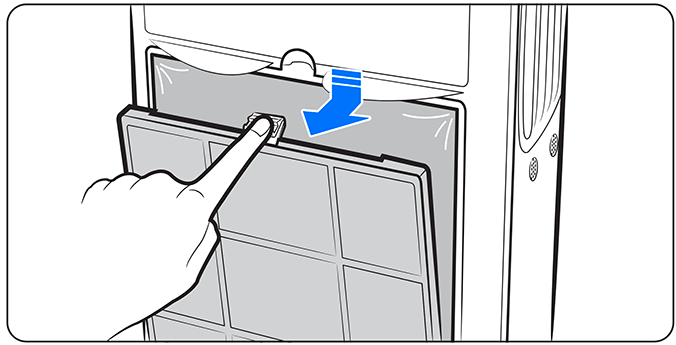
Use your thumbs to press on the top of the product and pull the front panel forward with your other fingers.
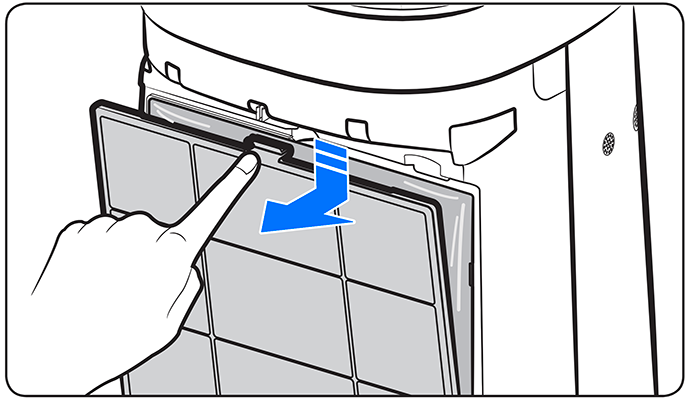
Rotate the filter holder 90˚ anticlockwise to release the filter and pull the 2-in-1 filter forward to remove.
Place the hooks of the front panel into the grooves at the bottom of the Air Purifier and push the panel into place.
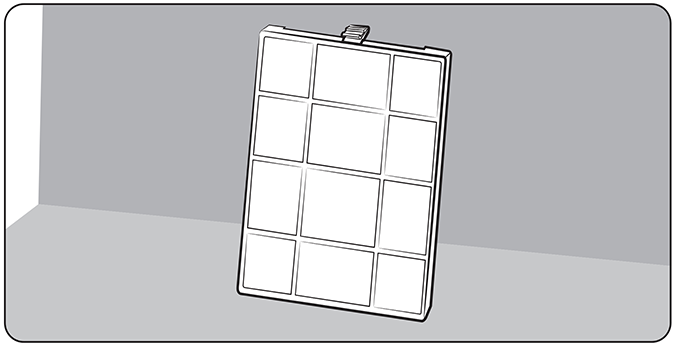
Place the filters in the shade until completely dry and keep away from direct sunlight.
It is recommended to clean the pre-filter once every 2 weeks if the Air Purifier is in operation 24 hours a day.
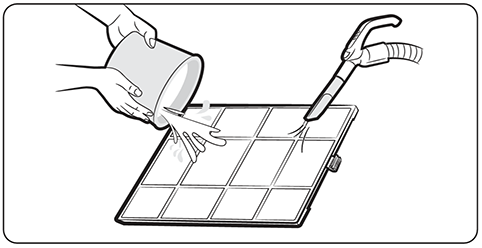
Caution: Do not use a brush or a similar tool to clean as this may damage the pre-filter.
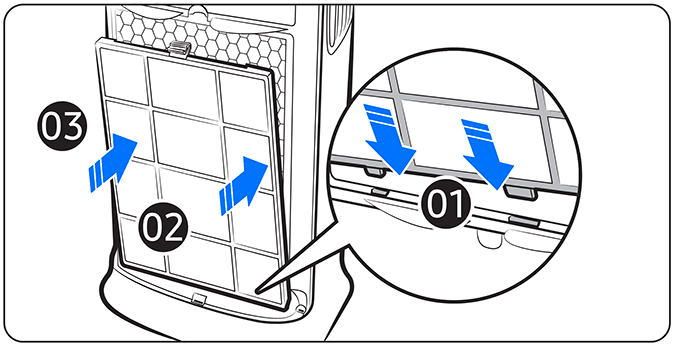
Check the direction of the filter is correct before inserting and then let the filters sit inside the grooves at the bottom (01) and gently push the top of the filter (02).
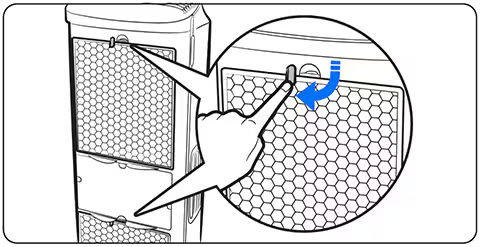
Rotate the filter holder 90° clockwise to hold the filter in place.
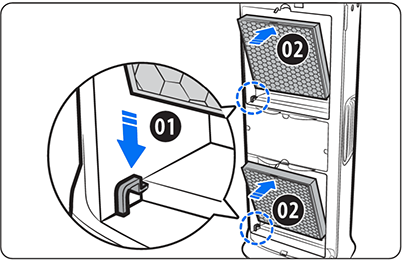
Place the bottom of the Pre-filter into the grooves (01) and then gently base the top of the Pre-filter into place (02).
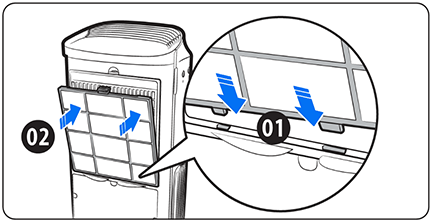
Place the bottom of the filter into the grooves (01) and then push the top of the panel into place (02).
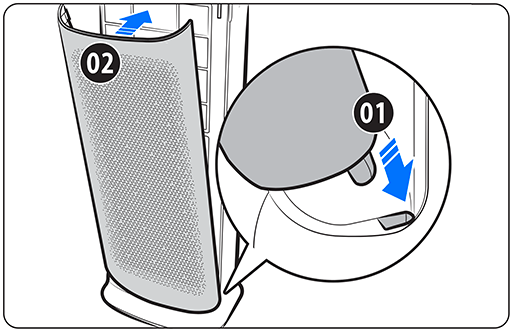
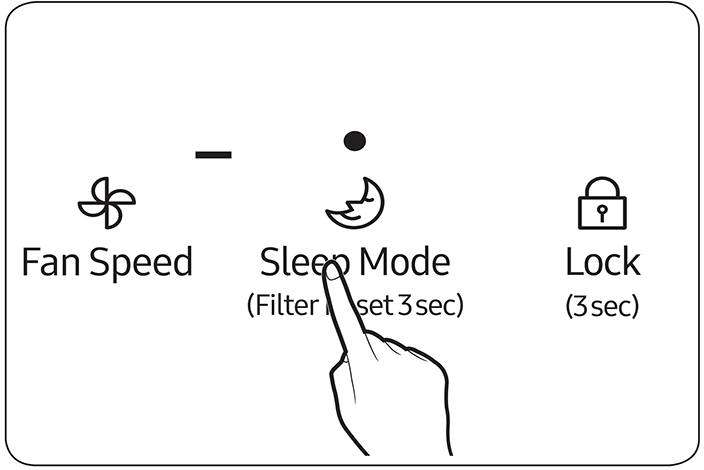
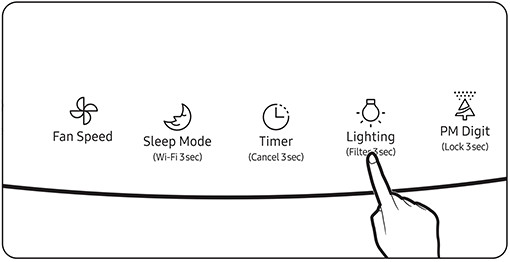
Before using the new filters, reset the filter replacement reminder by pressing and holding the Lighting button for 3 seconds or longer.
If there is dust or foreign substance on a sensor, use a vacuum to clean the sensor and its surroundings.
For further assistance, please contact our Chat Support team. To find your Samsung product's User Manual, head to Manuals & Downloads.
Thank you for your feedback!
Please answer all questions.
Contact Info
Contact us
WhatsApp
![]()
![]()

